Photo requirements for the Green Card lottery application form
In order not to “mess up” when taking a photograph for the DV application form (or for a US visa), you just need to go to the official lottery website and look at the requirements for photographs. Unfortunately, photo instructions are only available during the application period.
If you look at the Green Card lottery website at other times (not from October to November), then there is a high probability that you will not see a link to the instructions.
By clicking on the link, we look at the detailed instructions. And I will comment on each point for you.
Shadows and lighting
The instructions for the photo on DV say that you need to take a photo without shadows and with “normal” color rendition of the face. It seems like nothing complicated. However, in fact, this point is one of the most difficult. Why is this so? Yes, because it is very difficult for a non-professional photographer to take a photo without, for example, shadows.
Pay attention to the shadows under the ears. They shouldn't exist! Well, other shadows too! No shadows! At all!
Making a “healthy” and “natural” complexion is a little easier. Still, most modern cameras and smartphones have color adjustments. But the matter is also not so simple.
Glasses
Everything is simple here. Even if you wear glasses, take your Green Card photo without them. And you will be happy!
Head size and position
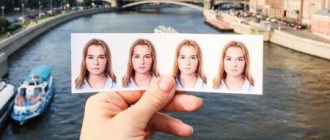
This example Green Card photo shows that you need to keep your head straight. Shoulders should also be visible a little. The head should occupy approximately 50%-70% of the screen. And the photo size is 51*51 cm. But from all this I want to note only the important details. This is the position of the head. This is really important!
But the size of the photo and the “head size” in the Green Card photo are not critical. Why? Yes, because you yourself can, using the program that I will talk about further, center and make the desired size for almost any photo.
Requirements for scanned and digital photos
If you want to scan a photo and upload it to the application form, then follow the following requirements. You need to scan a photo for a Green Card with a resolution of at least 300 dpi, and better yet 600.
But. I would advise not to mess with scanning. It is better to process a good digital photo for your Green Card online. And then all the requirements for the technical parameters of the photograph will be satisfied automatically.
By the way, I will give the same advice about digital photography. I will not present here the requirements for a digital Green Card photo. Of course, you can memorize and write everything down. But it’s much easier to immediately do everything as needed in the program, which I’ll talk about later.
Digital photo retouching
Remember. This is a very important point! You cannot edit, crop, edit, retouch, lighten, change color, etc. in the photo for the Green Card lottery. You can't fix ANYTHING at all! The program will automatically find errors and punish you!
Photographers in photo studios especially like to “dabble” in this! I myself have encountered this many times! They like to insert a white background when cropping the photo! You can't do that!
Head position and facial expression
Everything is simple here. You need to look straight into the camera. And don't smile. In general, facial expression should be neutral. Then there are two comments. If you take pictures of yourself, for example, with a smartphone, then photographing your head “straight” will be difficult. And one more thing - photographers in a photo studio often ask you to smile! Don't do this!
Photos of children
Due to the strict requirements for the composition and quality of photographs, many lottery participants have a question about how to photograph a child. Unfortunately, even for infants, most rules and recommendations remain in effect, and failure to comply may result in disqualification of the application.
It is especially difficult to fulfill two points of requirements:
- the child must be present in the frame alone, without parents;
- The child must look directly at the camera.
To meet these conditions for infants, two options are recommended:
- You can place your child in a car seat covered with a white blanket. This will provide support for his head and the correct composition of the shot;
- You can put the baby on a white sheet and take a photo of him from above. It is important to choose the right lighting so that there are no shadows in the photo. It is advisable to straighten the sheet so that it does not form wrinkles.
To get your child to look directly into the camera lens, try to somehow attract his attention. If you plan to use the services of a photo salon, check with them in advance to see if they can take photographs of children that meet the requirements of the green card drawing.
Hats
As for the hats in the Green Card photo, the instructions, of course, describe everything in detail on how to be photographed correctly wearing them if they are elements of national clothing. But... it’s better not to get involved with this if possible. And take pictures with a “bald” (that is, uncovered ) head.
Photo background
This is also the most important point! Photos of Green Card photos must be either white or light gray! Any other backgrounds are not allowed. As, by the way, are all sorts of irregularities and reflections on a white background. No photos against a window or curtains! Take this into account!
How to photograph a child?
Despite the fact that the rules for Green Card photos allow some liberties with regard to photographing a child, I nevertheless recommend photographing the child “as an adult.” Especially if the child is already older.
General requirements
All requirements can be divided into general, technical and compositional. Let's look at them one by one. You need to be attentive to each of them, otherwise the application will be rejected.
The photo on the green card must be as current as the photo on the American visa. This means it is done no more than six months before submitting the application. To do this, you can first visit a photo studio, where a professional will take a digital photo, scan an existing photo, or use a digital camera yourself. The last option is suitable only if you are sure that you have the required skill, because the photo must be “clean”, that is, retouching, adjustments or the use of special programs to adjust the quality are unacceptable. The photo cannot be narrowed or stretched.
Attention! However, if your appearance has not changed, and the photo was taken, for example, a year ago, and the hairstyle, hair color and other parameters remained the same, the photo will be accepted, no one will check its real age.
Do it yourself? Mission Impossible?
So. We've covered the basic photo requirements for a Green Card and examples of these photos. Now the question arises. Is it possible to take such photos yourself?
In principle, if you know the basics of “professional” photography (I really pushed it, yes
!), you can take such a photo yourself. Well, or if you don’t know it and you’re just lucky :). I couldn't.
If you start doing it yourself, then these are the main “ambushes” you will have to face.
- Shadows! It's very difficult to remove shadows! Therefore, try to take photographs without flash. It can be done outdoors in diffused lighting, for example without the sun.
- Background! It is very difficult to choose a white or light gray background. Firstly, finding a uniform background is not an easy task. For example, the refrigerator is glossy and responsive. Not only do you have to find a white sheet, but it’s also not easy to pull it on without wrinkles. And large sheets of whatman paper are also not easy to position, since the joints are visible. I’m generally silent about taking photographs on the street!
- Head position! Oddly enough, it is very difficult to keep your head straight, especially if you are taking pictures of yourself.
 And by the way, if others do too. And it’s also hard not to laugh. For some reason, it makes you laugh very strongly.
- Color rendition! Here knowledgeable people said that you need to look for white balance.
 Then a natural complexion will appear. I would also like to know how to look for this very white balance. In short, also with the color rendition pichalka
I picked up these tips from professional photographers. But these tips didn't help me. Well, I couldn’t, I couldn’t take a normal photo for the Green Card on my own. There is a high probability that you will not be able to either. What to do?
Don't believe, don't be afraid, don't trust photographers!
Well then. It didn’t work out on your own - you need to go to a photo salon. But don’t think that they are so cool there and will do everything right right away. No matter how it is!
Taking a normal photo in a photo salon also turned out to be very difficult. Photographers often simply do not know what a “Green Card photo” is. Another phrase “photo for an American visa” is more understandable to photographers. But God forbid, if half. The rest of the level 80 “professional photographers” still strive to “mess up” when photographing you in the photo of the DV profile.
- They photograph you against a gray background, and then cut out your photo and paste it onto a white background.
- They remove your stray curls
- They retouch pimples and warts
- They make you smile for the camera.
- They... however, the first four points are enough for your application to be disqualified...
My advice! Don’t be fooled by the coolness of the photo salon. Be sure to do the following:
- When going to a photo salon, say the phrase “I need a US visa.” Sometimes it helps. Photo requirements for a Green Card and an American visa are identical
- Print out all the requirements for photographs and persistently let the photographer (not the administrator!!!) read it. Well, or at least verbally focus on the important points that I talked about here.
- If you are photographing a family, it is advisable to photograph one family member first. And if everything is fine, launch the rest. Green Card photos are by no means cheap. And if the photographer still screws up the photo, then at least you won’t throw away a lot of money.
- Stand above the photographer's soul. Look what he does! Don't let him retouch the photo and add a white background! No matter what the photographer says! If it’s “stupid”, take the money and leave
- Ask that in addition to printed photographs, they also send you a digital original by email (or flash drive). At home, you will be able to compare whether the photographer “did extra work” on the photo. And they do this all the time. Their little hands are itching
 !
!
I’ll say right away that you may have to go around 3-4-5 or more photo salons until you find what you need. And further. In a small town it is almost impossible to find such a specialist photographer. It is better to immediately go to a larger city.
How to take a photo on Green Cand without mistakes
So. Here is the photo procedure for a Green Card.
- Take high-quality photos in a photo studio or yourself. The main thing is that the main points that I spoke about are observed. In this case, the size of the photo does not matter. It is better to make more “free” background. Make the maximum resolution you can.
- Next, go to the program that processes the photo to meet the Green Card requirements. It (the program) looks like this.
Center the head and save the “processed” photo. By the way, it will be saved in the required format! I will provide a link to the program further. It is also on my website. If it's not clear, watch the video below. Everything is described there in detail.
- Next, check the resulting photo on a special website. It's free! I'll also give the link below.
What should I check? Well, actually, there are a lot of parameters. But pay special attention to two points.
It is necessary that the eyes fall into the red stripe and...
So that the lower part of the jaw falls on the green stripe.
This. By the way, it is necessary that the photo parameters meet the requirements of the automatic face recognition system.
- And finally, you can check for compliance with technical requirements (resolution, dimensions, etc.) on another site. Link below.
But if you took photos according to my recommendations and processed them using the links provided, then everything will be ok. Yes. And it’s better if you watch the video below on how to check it correctly. There are some subtleties that are difficult to explain in words. It's better to show.
By the way, please note that the background in the uploaded photo is incorrect. Dark grey. However, the program accepted the photo for the Green Card
That is, the program looks very formally and does not “see” some things. For example, he doesn’t see the background. Or head position. And so on. Control this manually yourself. Otherwise, the photo may be rejected by human moderators!
- If everything is fine, you can upload the photo to the Green Card application! Profit!
Specifications
The higher the quality of the photo, the better. In the 2021 lottery, all photos are checked by the E-DV system , it will not miss photos that do not meet the requirements and will notify you about this.
- Be sure to adjust the sharpness and make sure the face is in focus.
- If it is not possible to take a photo directly from a digital camera, you can scan an existing one.
- Pre-install True Color or 24-bit color mode on the scanner. This will give a mandatory color depth of 24 bits.
- The image must be scanned at a resolution of at least 150 dots per inch (DPI).
- Only color photographs are suitable. Gray or black and white simply will not be accepted.
- The file is downloaded in JPG (JPEG) format.
- The file should not be “heavier” than 240 kb
- The minimum photo size is 600*600 (width by height). This way the photo will be square.
- Pictures with grids or extra pixels will not be missed.
- No shadows on the face or background.
- It is important to properly expose the photograph when developing; do not overexpose it.
Here are some useful links for making DV photos
- Official website of the Green Card lottery. https://dvlottery.state.gov
- A site for free verification of your photo. https://www.greencardphotocheck.com/ru/
If something remains unclear to you, I recommend watching this video. Here I clearly talk about all the stages of making a photo for a Green Card.
I hope that after this article and this video you learned how to properly take a photo for a Green Card. Well, I’m not an expert on all these issues. I wrote what I learned from personal experience. So it's great don't swear 
Internet advertising specialist Alexander Bessonov
